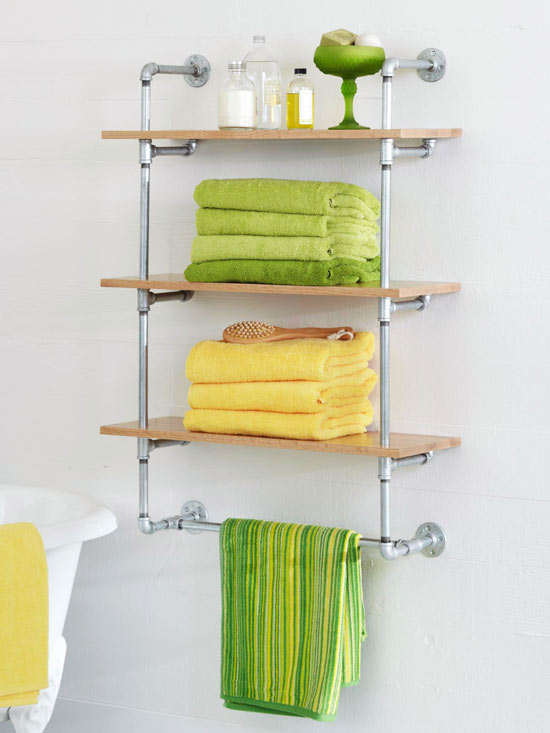
Very Cool weekend Project!!!
What You Need:
Three red oak shelves, each measuring 1x31x8-inches (Shelves can be cut from a 12-foot-long board (that’s 1 inch thick and 8 inches wide) using a circular saw or hand saw.)
- Drill
- 1-inch hole saw
- Fine-grit sandpaper
Galvanized-steel plumbing pipes and connectors:
- Two–3×1/2-inch pipes
- Eight–1/2-inch-diameter tees
- Two–2×1/2-inch pipes
- Four–1/2-inch-diameter floor flanges
- Ten–1/2-inch-diameter elbows
- 24×1/2-inch pipe
- Twelve–6×1/2-inch pipes
- Four–12×1/2-inch pipes
- Lacquer thinner
- Pipe Wrench
- Sixteen toggle bolts
- Diagram

2. On both front corners of one shelf, measure and mark a dot 2-3/4 inches from the edge of the long side and 3 inches from the edge of the short side. Repeat for the two other shelves. Create a pilot hole over each dot with a 1/8-inch drill bit.
3. Align the hole saw with the pilot hole, and cut a 1-inch-diameter hole through the wood. Smooth any rough edges with sand paper. Repeat for each pilot hole.
4. Remove all labels from galvanized steel plumbing parts. Clean and shine all parts by wiping them with lacquer thinner let dry.
5. Referring to the diagram, begin constructing the shelving unit working from the bottom up. Start by connecting a piece of 3-inch pipe onto the side of a tee that will face the wall and a 2-inch pipe on the other side. Join a floor flange to the 3-inch pipe and an elbow to the 2-inch pipe to create the left towel bar support. Repeat to create the right towel bar support.
6. Connect the left and right towel bar supports by attaching a 24-inch pipe to the tees to complete the towel bar base. Tighten all pieces with a pipe wrench, making sure the open end of each elbow faces.
7. Next, join a 6-inch pipe to the open end of each elbow. Attach a tee to each 6-inch pipe with the center placed parallel to the towel bar supports below.
8. Join another 6-inch pipe to each tee so they’re parallel to the towel bar supports. Add an elbow to each parallel 6-inch pipe so their open ends face upward to create the shelf supports. Tighten all pieces with the pipe wrench.
9. Slide a 12-inch pipe through each hole of a wood shelf; rest the shelf on the shelf supports. Connect the 12-inch pipes to the unconnected ends of the tees on both sides. Tighten with the pipe wrench.
10. Attach a tee to the unconnected end of each 12-inch pipe. Repeat steps 8 and 9 to create another set of shelf supports, and add the second shelf.
11. Slide a 6-inch pipe through each hole of the third shelf. Connect them to the tees at the top of the structure. Attach an elbow to each of the 6-inch pipes, making sure the elbows are placed downward at a 90-degree angle. Attach a 6-inch pipe to each elbow; the pipes should be parallel to the shelf supports below. Secure a floor flange to the unconnected end of each pipe. Tighten remaining pipes and parts with the pipe wrench.
12. Securely mount your custom shelving to the wall with toggle bolts.